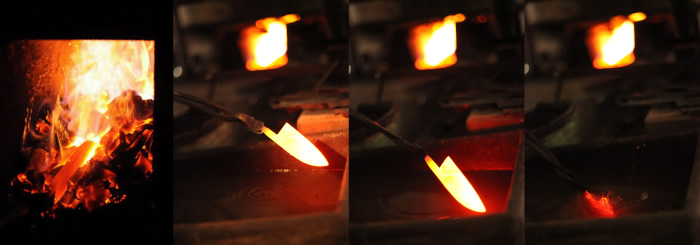
Warikomi: A, to the West, unknown ancient Japanese manufacturing process.

The “Warikomi Process” – A glowing hot piece of iron is split and a piece of steel is inserted. The new material is now forged into one piece. This creates a highly durable kitchen knife. Only a skilled craftsman can perform the “Warikomi Process”.
The secret techniques of how Japanese knives are made revealed. All you need to know.Split and Insert Method.

1.Preparation of materials
Only two materials, steel and ferrite, are used in the traditional Japanese manufacturing method called the “split and insert method”. The specific steel and ferrite used are selected depending on the purpose of each individual blade.

2.Split and Inserting
We split the heated ferrite and insert the steel blade, refine it, and form it into a three-layered construction of steel sandwiched by ferrite. Through further refining, the materials will be firmly joined together.

3.Cutting out the materials
We stretch the three-layered material, that have been reddened and softened by the kiln, into a long, thin bar and then cut it into knife-sized sections.

4.Creating a form
We heat the newly made knife-sized sections, repeating the refining process 3-4 times, and before the carbon, that provides natural strength to the knife, leaves the steel, we quickly shape the piece into a knife with a hammer.

5.Annealing
In order to unify the irregularity formed in the particles during steps 2-4 and to create a functioning form, we heat and redden the blade until it reaches 760-800℃ and cool it down slowly in a “Warabai” for a day.
6.Quenching/Tempering
Depending on the purpose of the blade one of two methods of quenching is used. Water quenching which is done after mud painting or oil quenching. After heating the knife to an optimal temperature of 790~830℃, we quickly place the knife in “water” or “oil” to rapidly cool it down. This allows the particles of the steel to tighten and creates an extremely hard structure (The photograph shows “water quenching” done after mud painting). The process of maintaining the temperature during the quenching of a red hot knife requires years of experience and intuition. Quenching can fail if the timing is off by the slightest bit, turning the knife into scrap iron, meaning the process is a serious feat to accomplish.


In the quenching state the knife will be extremely hard and therefore brittle. In order to maintain the viscosity of the blade, we add heat and temper at the timing and temperature that is best for each blade.

7.Rough sharpening
Enclosing the knife inside a grinding board, the steel is first sharpened crudely, using a sharpening stone with rough grains. Then, subtle adjustments are made by uniformly hand-sharpening the steel.

8.Finishing sharpening
To achieve the perfect cutting edge for the knife it is then hand-sharpened with a sharpening stone with finer grains and the surface is finished to create an even sharper edge.

9.Signature
The knife is now signed off with “Daiyusaku”’s logo which is punched into the knife.
”Daiyusaku” means “Handmade by Daiyu” in Japanese

10.Attaching the handle
The knife is inserted into the handle after heating the handle-section of the knife until red. We adjust each knife by hammering the bottom of the handle to adjust it to the optimum angle for comfortable use.